


SHOWBUS AUSTRALIA BUS IMAGE GALLERY
St Kilda Tramway Museum
 |
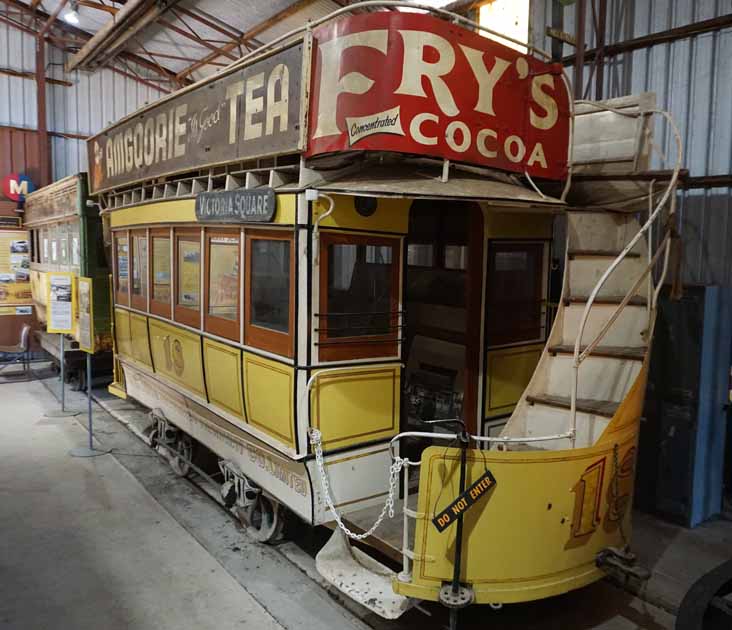
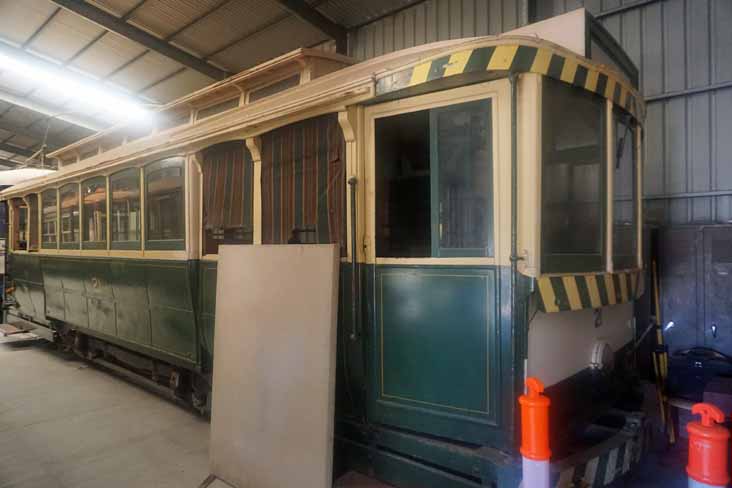
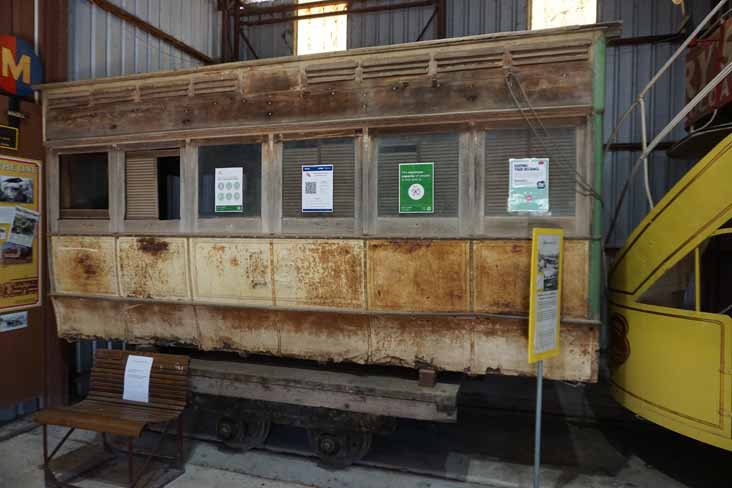 The Adelaide, Unley and Mitcham Tramway opened its line on 12 February 1879 with a fleet of horse drawn trams. Most of the horse trams had a back-to-back knifeboard seats upstairs, but this car, 15, was one of the few that had conventional transverse seats which tipped over when the tram changed direction. It was built locally by Duncan and Fraser. Car 15 served for many years as a summer house in a garden at Fowlers Road, Glenunga. A corrugated iron roof protected the main body section from the weather for sixty years so it has survived in a restorable condition, but that is wait and see for now.
Picture ref D9693 |
 The open staircase of this restored Adelaide & Suburban Tramway car can be seen in the picture above. Adelaide & Suburban had a fleet of ninety cars with 650 horses. Car 18 was ordered from John Stephenson and Company in New York for the first services in 1878. It is thought to have been built as a singledecker and later converted by the company. It survived for fifty years as a playroom and fern house at Walkerville Terrace in Walkerville then acquired by the National Trust in the sicties and restored by staff of the South Australian Housing Trust then stored at the old Maylands horse tram depot. It was transferred to St Kilda for display in 1971. In 1978 it was repainted in its traditional colours by students and staff of the Marleston TAFE College for the Centenary of Street Transport celebration in June tht year.
Picture ref D9692 |
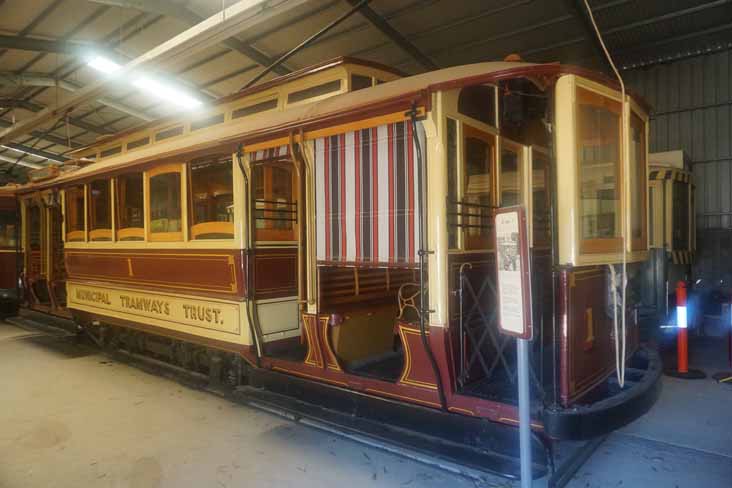 Remarkably tram 1, dating from 1908, has survived five decades before joining the Museum. It was the first of one hundred electric trams which were later dubbed the A class. They only sat forty passengers but could crush load a hundred! Tram 1 ended its days as a shunter in Hackney depot, thus outliving the other 99.
Picture ref D9702 |
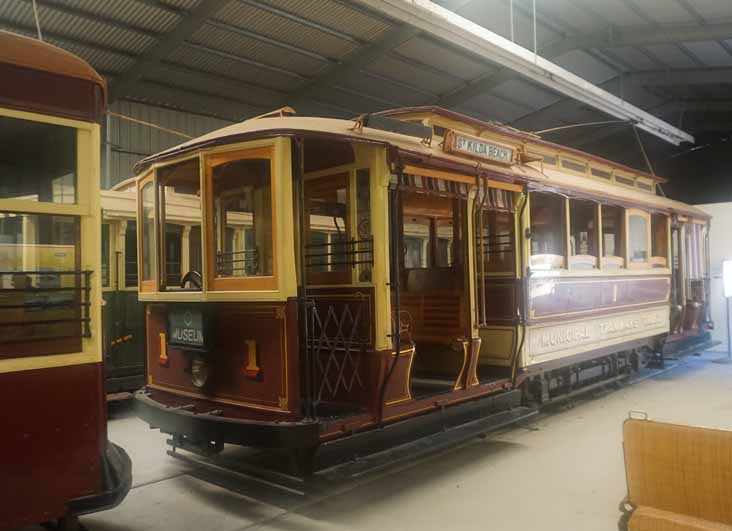 A second view of car 1 from the other end.
Picture ref D9711 |
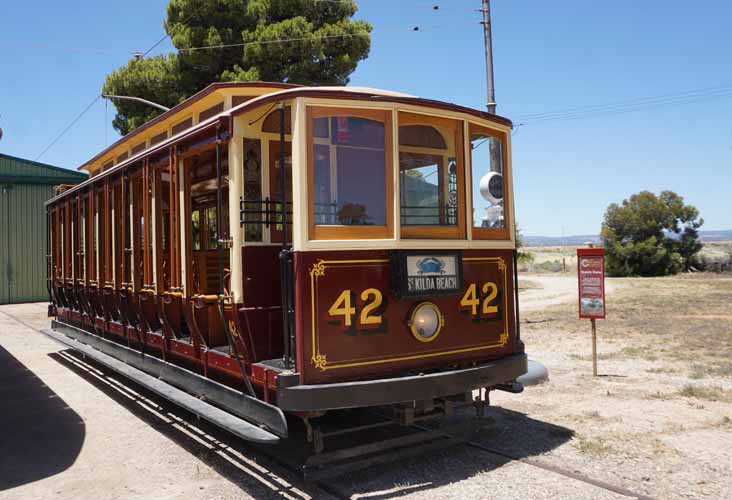 Part of the initial one hundred cars ordered was a batch (31-60) of toastrack cars, one of which - 42 - has survived. The toastracks were popular in summer transporting the Tramways Band to perform at the numerous bandstands around Adelaide. Out of summer, the open sides proved less popular in inclement weather and most were converted to combination trams in 1917. Car 42 was rebuilt with straight sided centre saloons with three large windows being designated an A2-Type and operated on the isolated Port Adelaide system until that closed in 1935. It was then retained at Hackney Depot as a store until donated to the Museum in 1958. It was reconstructed by the Museum to toastrack configuration and returned to service in 1994. On the 30th December 2025 it was one of three trams available to give rides to visitors on the Museum's reserved track.
Picture ref D9688 |
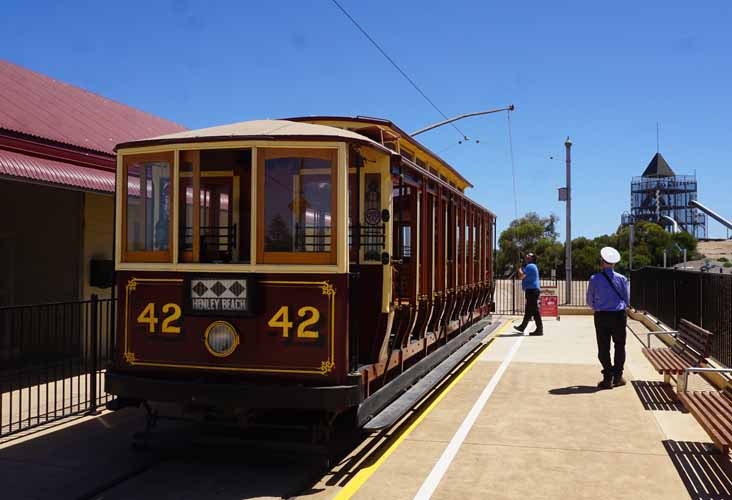 Here it is later in the afternoon 2.2km away at the other end of the track at St Kilda Adventure Playground with its crew.
Picture ref D9698 |
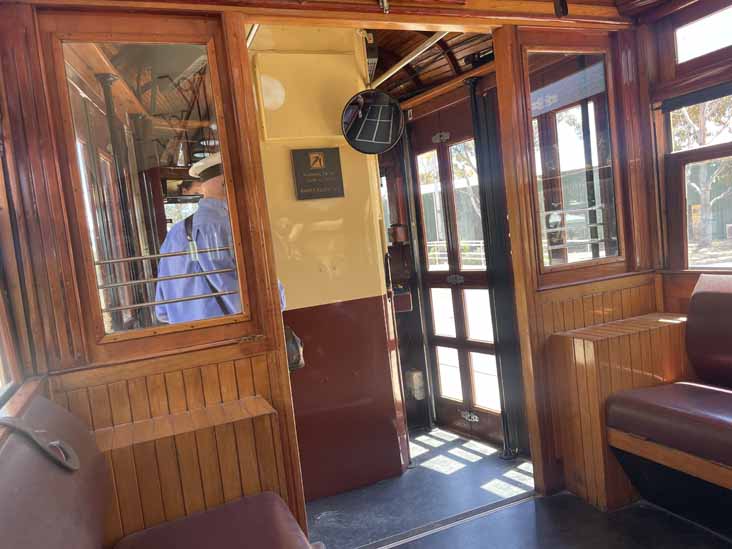 An interior shot of 42 whilst under power showing off the excellent carpentry inside.
Picture ref P1940 |
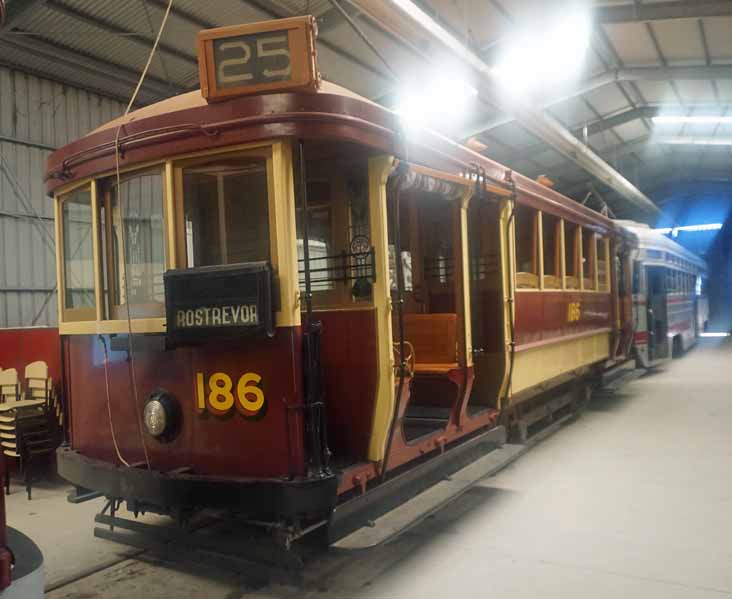 During the First World War the MTT urgently needed more tramcars because of passenger traffic generated from extending the system. So twenty cars similar to the A type were built by Duncan & Fraser. They looked very modern because of their arched roofs, though this was a cost saving measure, not an intentional design feature. They too seated forty passengers and carried a further sixty-two standees. Larger motors made them faster and they soon became known as "Desert Gold" trams after a successful New Zealand racehorse. Their speed was subsequently utilised in competition with the unlicenced private buses which appeared on the tram routes in the early twenties. They continued to be used in peak traffic until 1952 and last saw service during the royal visit of 1954. In their later years they were known as "Bouncing Billies" rather than "Desert Golds" due to the lack of air brakes which made the ride noticeable less smooth! The body of 186 was retrieved from Woodlands School at Glenelg in 1983 where it had been used as a playroom for the junior school. The tram has been extensively rebuilt and was officially relaunched in March 1989.
Picture ref D9708 |
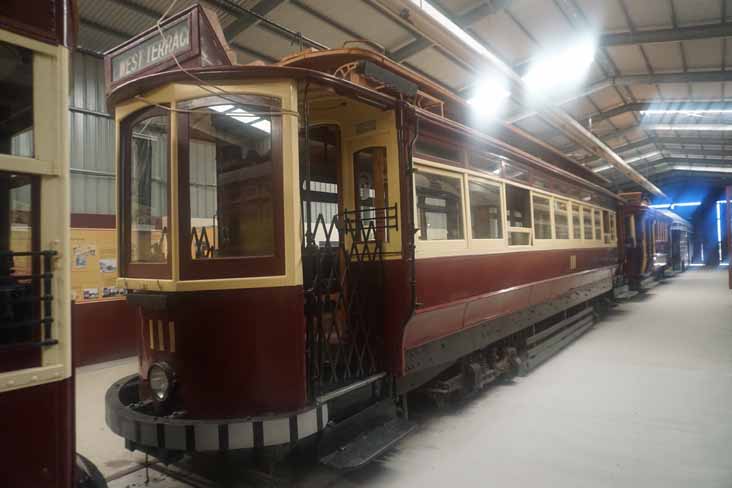 The E1 Class Saloon Bogie trams, like 111 here, were rebuilt in 1936 from 1910 E Class. The rebuilding involved the removal of crossbench seats and extension of the saloon for the length of the car. The new saloons received the wooden seats from the original saloons and specially imported English moquette upholstory on foam rubber cushions was fitted in the original saloons (the non smoking compartments).
Picture ref D9706 |
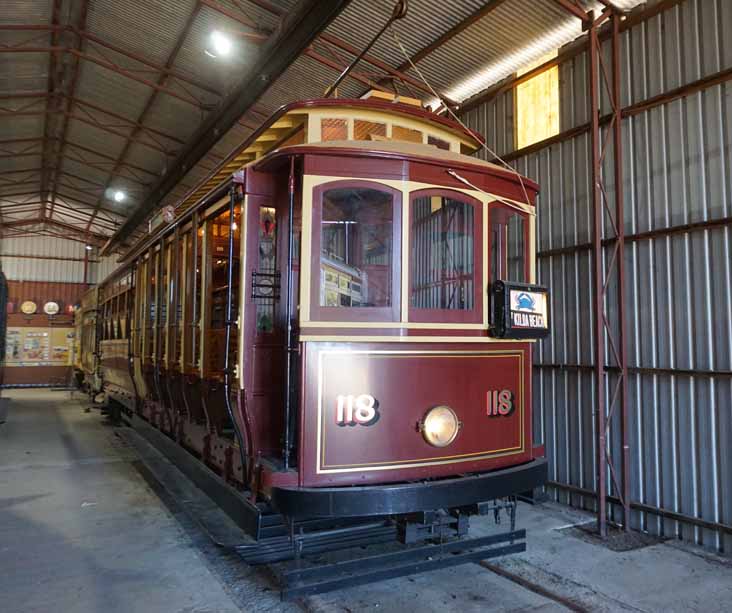 E-Class 118 was a major restoration project for the Museum. It arrived at St Kilda in 1982 after residing at Fishermans Bay for well over twenty years. It was one of the first of seventy cars built between 1910 and 1912 for the expansion of the tram system. They had a saloon at one end and 54 cross bench seats at the other.
Picture ref D9690 |
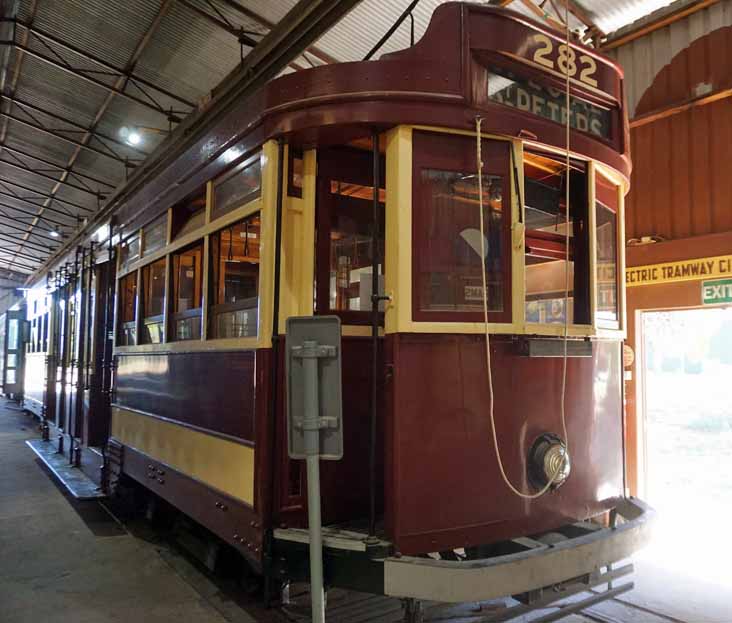 The F and F1 Class trams, built by Pengelly in the late tewenties had a Drop-centre, more modern running gear taking up less space meant that the car body could be lower to the ground, making boarding easier. Six feet longer than the earlier D and E classes, they had sixty seats with space for 110 Standees. They were popular with the public and were especially suitable for heavy traffic like Horse Races, Football Games, the Royal Adelaide Show and beach outings. Car 282 was one of 84 built, three in the MTT workshops, on retiring it was used as a sleepout on a farm at Clare until retrieved in 1981 and reconstructed by 1986 using ex Melbourne W2 class tram bogies and electrical equipment.
Picture ref D9691 |
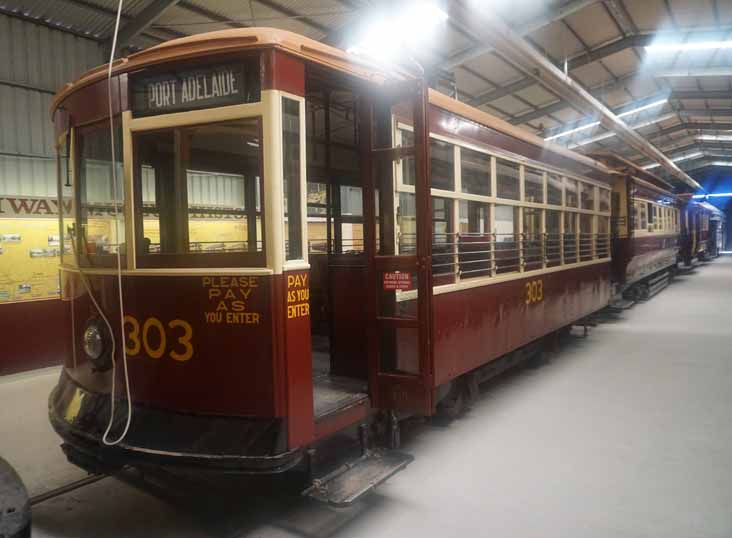 Only four G-class trams were built for Adelaide by J.G. Brill and Co. of Philadelphia, USA and assembled in the MTT workshops in 1924. Named after the designer, Charles Birney, the small thirty-two seat Birney Safety cars were used on the isolated Port Adelaide tracks. Replaced by buses and trolleybuses their Adelaide life was only ten years and they were snapped up by Geelong in 1935, passing to Bendigo Tramways in 1947. Unfortunately 303 was badly damaged in an accident in 1956 and sold to a farmer near Maryborough. The Bendigo Trust got back the body of 303 in 1975 and reconstructed it using original mechanical components. The interior seating, which had been sold to a local Bendigo resident, was also obtained and reinstalled. It entered service at St Kilda in August 1976. Meanwhile the other three soldier on in Bendigo.
Picture ref D9704 |
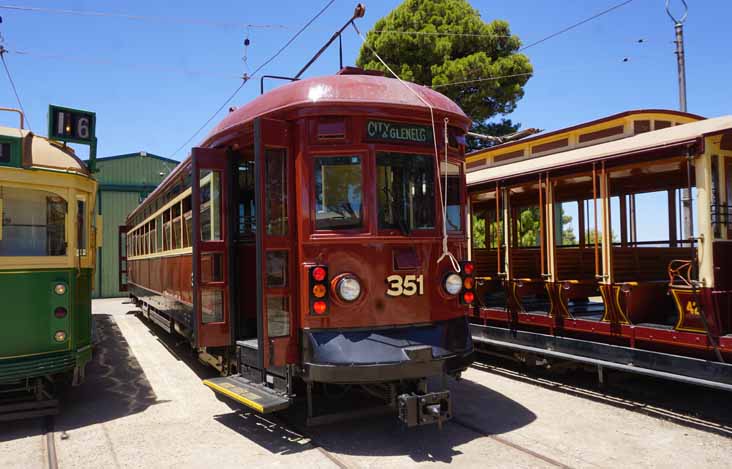 Before the advent of the modern low floor Bombardier cars the remaining Glenelg line was in the hands of the H-class. The class was made up of thirty trams built in 1929 for the Glenelg line. They could run in coupled sets, had power operated doors, folding steps and reversible leather seats. This is 351, the first of the batch, one of the trio of cars offering rides that day.
Picture ref D9687 |
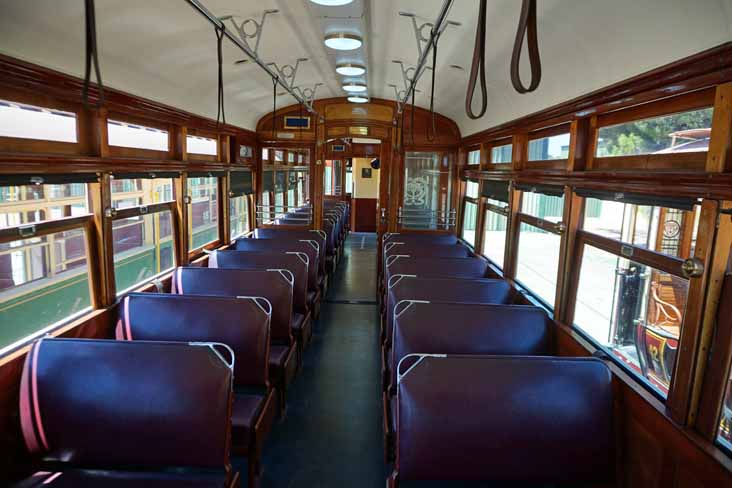 The interior of 351.
Picture ref D9695 |
 Car 351 at the St Kilda Adventure Playground.
Picture ref D9696 |
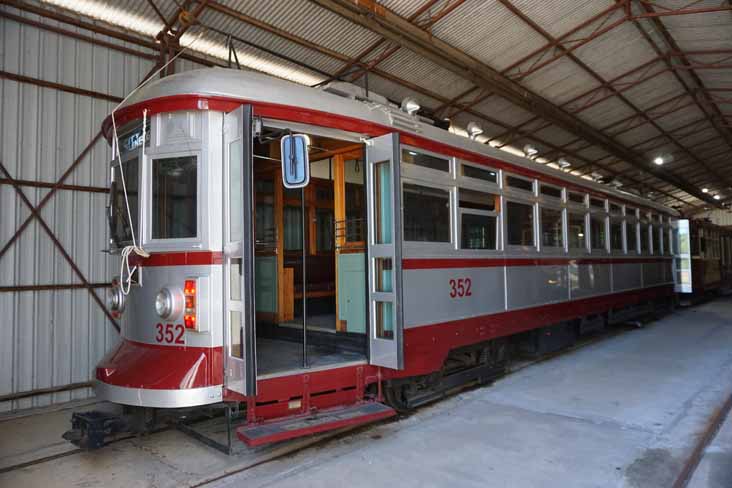 Between 1952 and 1956 all thirty H class cars were painted in this silver and red livery, presumably linked to the Coronation of Her Majesty Queen Elizabeth II. Car 352 is preerved in these colours.
Picture ref D9689 |
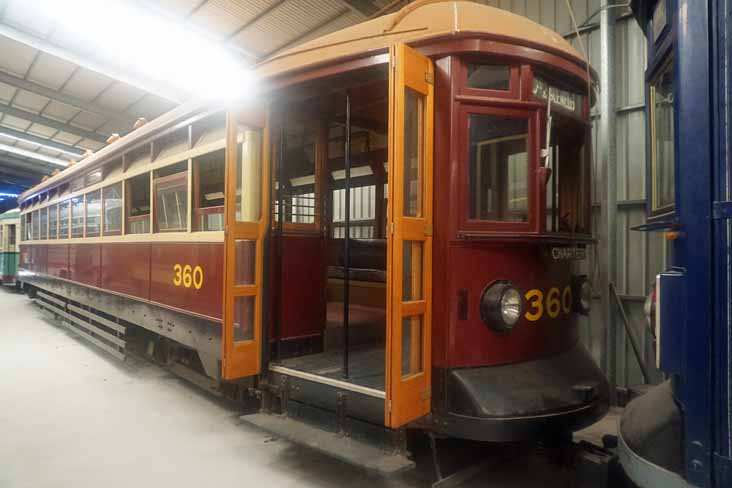 From 1971 all the H class cars were refurbished, though 360 and 362 escaped but car 360 was returned to its original specification for the 1999 seventieth anniversary of the Glenelg line.
Picture ref D9707 |
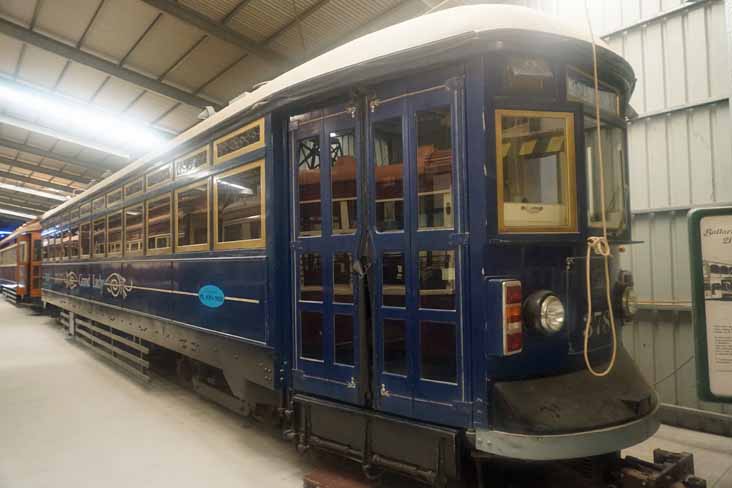 A one off unique H class was 378, turned into a restaurant car in 1990. It ran for a couple of years serving pre-cooked meals from elaborate three course dinners to simple afternoon teas up to six times a day. Unfortunately the enterprise was not financially viable went# bankrupt. A couple of years later TransAdelaide attempted to revive the business by renaming the tram "The Grand Lady" with meals pre-cooked by the Grand Hotel at Glenelg but, unlike the ventures in Bendigo and Melbourne, it was not a success. The tram arrived at St Kilda for storage and display in June 2007.
Picture ref D9705 |
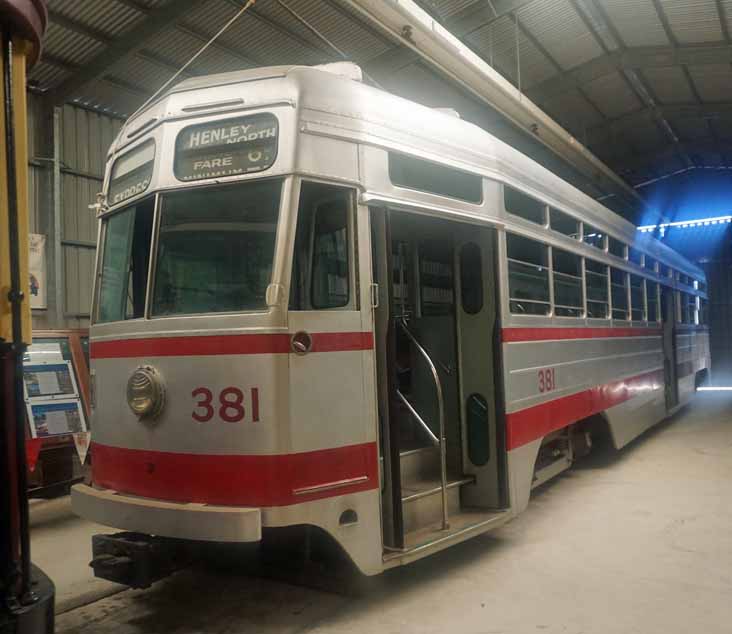 Stylish H1-class 381 was the first of a projected order of 40 cars planned in 1939. However the first tram was not built until 1952 coinciding with tramway abandonment policy so the order was cancelled. The tram has an all steel body, is fitted with power operated doors and four destination blinds at each end of the car, a style which was later used on the replacement buses. The interior was painted asbury green & cream and fitted with fixed bus seats. It entered regular service in February 1953, but only lasted till December 1957. It was donated to the Museum and arrived on site in August 1965 four months after the official opening.
Picture ref D9709 |
 Former Yarra Trams Class W 1031 joined H class 351 and B Class 42 on the free rides on the day of the visit in December 2025.
Picture ref P1939 |
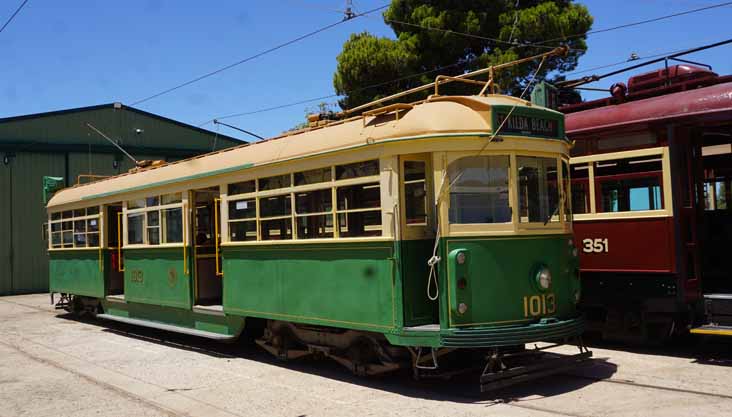 The Melbourne car arrived at St Kilda (Adelaide) in 2005. Its centre saloon has been modified for disabled access with the wide sliding doors providinf more protection for disabled passengers in times of inclement weather.
Picture ref D9686 |
 Ballarat 21 was originally Adelaide A class 10. In 1936 three were sold for use in Ballarat. Its body was reconstructed in 1938 for one man operation. In the sixties the tram was fitted with dash canopy lighting to reduce the possibility of collisions at night. It operated until the closure of the Ballarat system in September 1971 and arrived at the Museum less than a week later.
Picture ref D9703 |
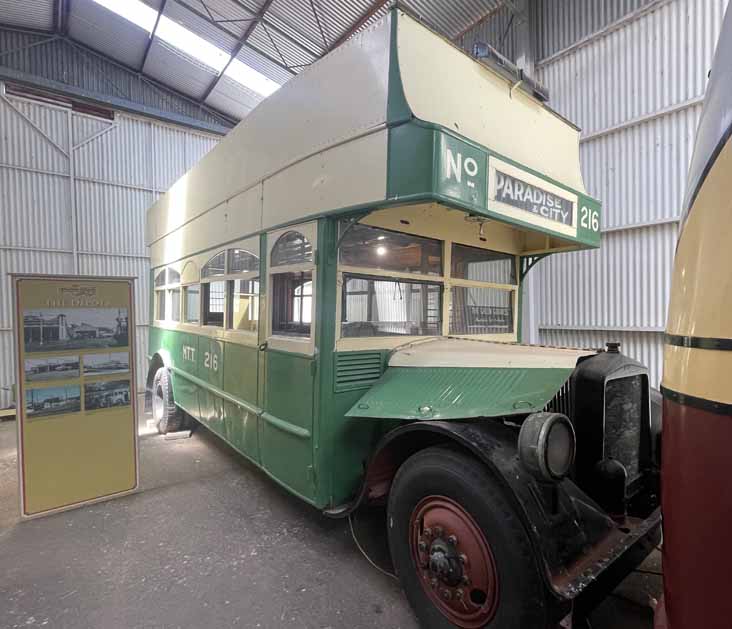 In the UK there is quite a business in the 2020s of converting diesel buses to battery electric power. This bus, built by South Australian Railways in 1925 as an opentop petrol bus with 56 seats, was a pioneer in conversion to electric power. The bus, 216, was one of 28 vehicles brought to compete with private buses on the Glenelg line, they passed to MTT in 1927. In 1932 216 was converted into a 32 seat singledeck trolleybus with trolley poles mounted on the former top deck and its petrol engine and gearbox replaced by 80hp Dick Kerr electric motor. The bus was used until 1934 on an experimental off-peak service between Payneham and Paradise, the short route being the first trolleybus line in Australia. It gained the nickname "green Goddess" because of its out of the ordinary green livery. After the opening of the main trolleybus system in 1937, 216 was used for maintenance work. In later years, stripped of its fittings, it served as a lunch bus for tramway tracklaying gangs being purchased by the Museum in 1957 and arriving at St Kilda in 1965 after offsite body restoration.
Picture ref P1946 |
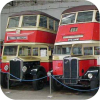
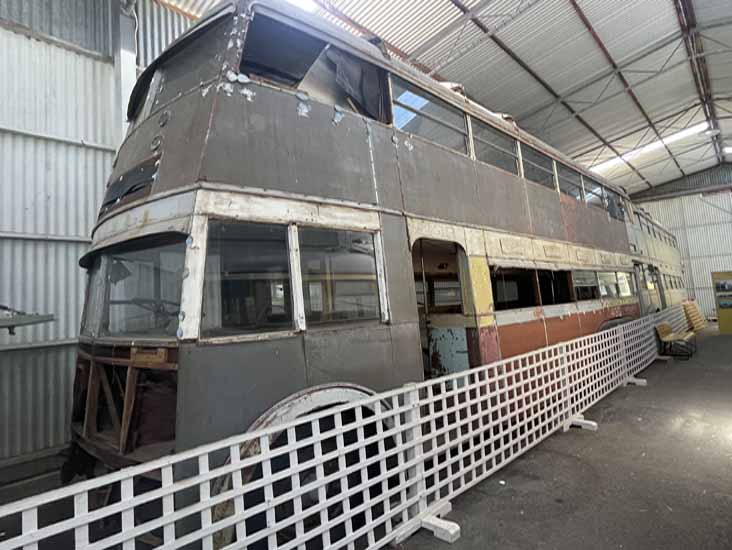 The success of the experimental trolleybus 216 resulted in orders for thirty doubledeck trolleybuses built by Lawton and Sons in 1937 on AEC 661T trolley chassis. Numbered 401-430 they sat 33 upstairs and 26 down, with a maximum capacity of 84. They were fitted with 80hp Metropolitan Vickers 201 motors mounted and originally painted tuscan red and cream, but were repainted silver and red in later years. They were withdrawn by June 1957, but a few re-entered service for a short period in August 1958, when additional motorbuses were required on former tram routes. Trolley 417 was retained for conversion into a meal bus for use by bus crews at Kent Town, and was renumbered S106. Tables were fitted in the lower deck, and a hot water service was installed upstairs. A power box located on an adjacent pole provided electricity for the water heater. The bus was driven each day from Hackney Depot to its Kent Town location, a practice which continued for several weeks after the closure of the trolleybus system until it had to be towed from place to place by a tractor. When it was no longer required it was then donated to the Museum in 1967.
Picture ref P1948 |
 In better shape is Lawton bodied Sunbeam MF2B, one of an order placed for thirty single deck trolleybuses after the end of the Second World War, but the shortage of materials for construction meant it was 1953 before the order was completed. In that year 526 was the last trolleybus to be built in Adelaide. Each trolley was powered by a British Thomson Houston 210 motor, of 114hp with forty seated passengers and 33 standees. It last operated on 13 July 1963 on a farewell tour when the trolleybus system closed. It was later purchased by members of the Museum and brought to St Kilda where the body was restored in 2000.
Picture ref D9700 |
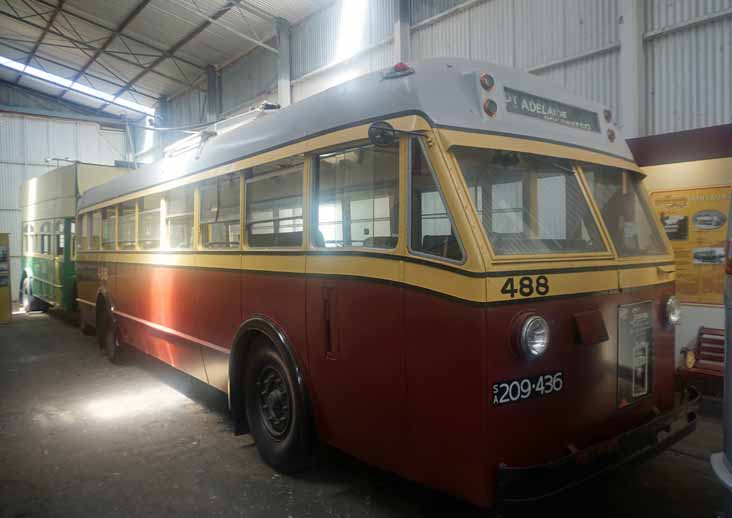 Trolley 488 of 1945 was a Leyland intended for the for the Guangdong province in China. However the war resulted in the 26 being purchased and bodied by the MTT between 1942 and 1945 and numbered 471 to 496. These single deckers had a seating capacity of thirty and a crush load of sixty. They became popularly known as cantons because of their Chinese history or wombats (because of their looks?). They remained in service until 1963.
Picture ref D9701 |
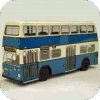
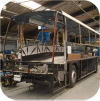
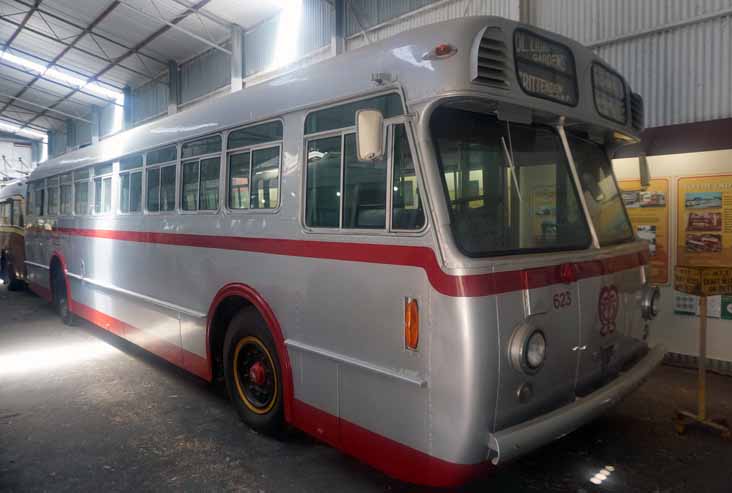 This bus has been preserved by the Museum as an example of the type of vehicle which replaced Adelaide's trams. When the decision was made to convert the tram system to bus operation in the fifties, the MTT designed buses featuring three doors for rapid loading, and a crush capacity approaching that of the trams. The buses had underfloor engines, forty seats and forty more standees. The Lawton bodies mirror those of the Sunbeam trolleys. The bodies of the first seventy were fitted on AEC Regal IV chassis and started to enter service in 1954, lasting until 1971. This bus, 623, had a second lease of life in Adelaide in 1975
as 8439 when a critical bus shortage arose because one operator declined to sell his fleet to the new State Transport Authority (STA). It continued in traffic until 1979 arriving at the Museum in early 1989.
Picture ref D9699 |
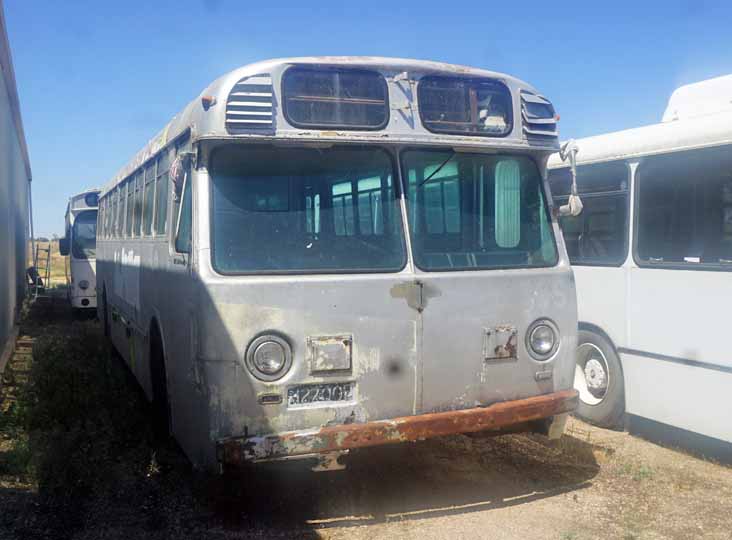 A collection of former Adelaide buses was stored in the open out the back of the Museum sheds. Ownership is umknown, but this is another Lawton bodied AEC Regal IV.
Picture ref D9717 |
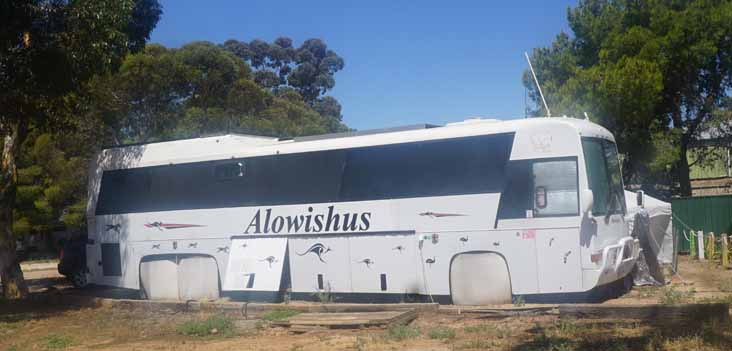 Meanwhile alongside the entrance this coach appears to have been converted into a motorhome and dubbed "Alowishus".
Picture ref D9713 |
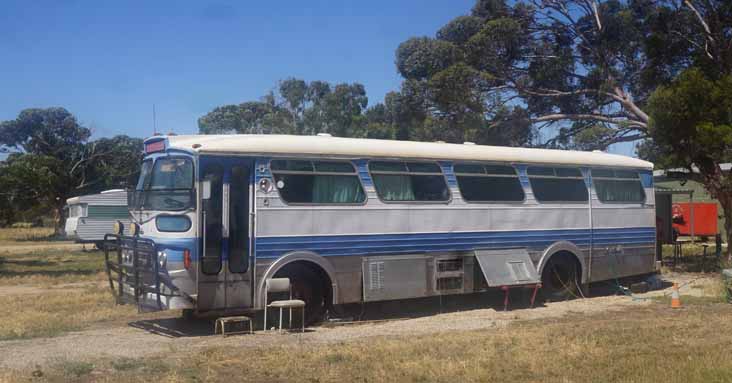 Seemingly used in a similar capacity nearby was this Freighter bodied coach.
Picture ref D9712 |
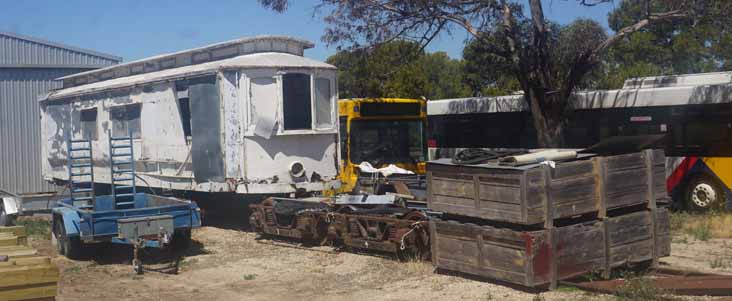 Out back near the collection of buses was this unidentified tram.
Picture ref D9714 |
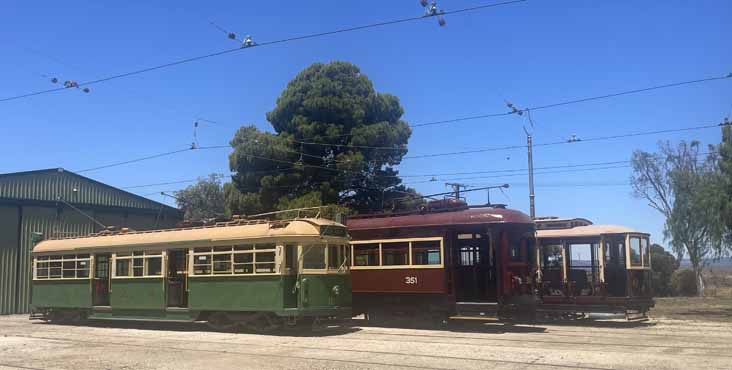
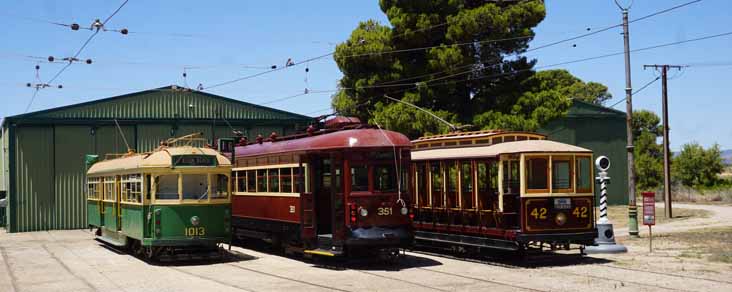 A final view of the trio of trams at work that day. Not all of the Museum's collection are operative, but those that are take turns in providing the service.
Picture ref D9694 |
|